 The schedule
window floats in the workspace allowing access to the drawing and other dialogs.
The schedule
window floats in the workspace allowing access to the drawing and other dialogs.|
Create a Schedule
|
The schedule
window floats in the workspace allowing access to the drawing and other dialogs.
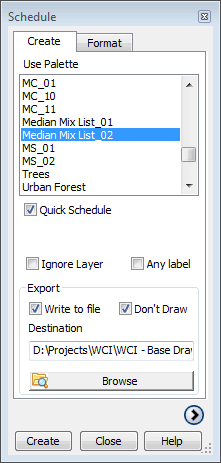
In its checked state as shown in the screenshot, an existing list can be selected to schedule. Click the Create button at the bottom of the dialog to begin. You will be prompted to specify a selection window or optionally to select, or draw a polyline. Ensure the extents of the polyline are visible and at the prompt, pick an insertion point to create the schedule.
When 'Quick Schedule' is unchecked (the default state), saved schedules are
displayed in the listbox as shown in the screenshot below.
Multiple schedules can be selected and regenerated by clicking the Update button. Using the Display button at the top of the dialog, you can zoom to any selected schedule or group of schedules.
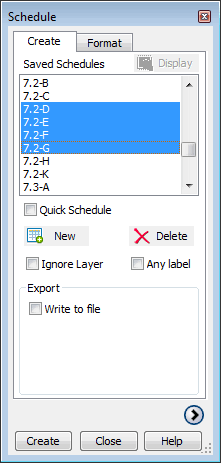 To edit the properties of a saved schedule, double click on its name or click on the expand button at the bottom of the dialog.
To create a new schedule, click on the 'New' button which will expand the window. Name the schedule and define settings including insertion point, selection area and lists to save.
You can delete single or multiple schedules depending on the selection.
Check to include data which belongs to a PlantManager list but has been moved onto a layer not specified by it. In some circumstances it is helpful to move data to a new layer to manage plotting visibility.
When checked, any label which matches one of the pre-set formats (ie. key name and quantity separated by a space / quantity and key name / key name with quantity in brackets) will be counted. This can be helpful to generate schedules with drawings manually created or using another software package.
When used in combination with the 'Ignore Layer' check box, any label regardless of layer which matches a pre-set format, will be included in the schedule calculation. Limitations are it will only work as a quick schedule (using the current list), it ignores blocks (assumed they are already labelled) and it won't work with long labels or those made up of multiple key names representing more than one plant.
Check to create a comma delimited file of the
schedule output. Browse for a folder location to save the file.
Check 'Don't Draw' if you don't want to draw the schedule to the
drawing.
Click the format tab to define text styles, height and colour. See the Schedule Format section for details.