 Label button
|
Label
|
You can label a closed polyline, open polyline or hatch to assign the selected plant or finish to the drawing object.
Create and label an open polyline where a narrow planting area occurs and area calculations don't adequately represent the density required. Labelling an open polyline applies plant spacing according to the measured length. Stretching the polyline will recalculate plant quantities according to the spacing.
Using the palette:
Label button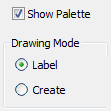
Using the main dialog:
Using the palette:
Label button Using the command line:
You can label with or without a leader. To place text without a leader, type 'a' at the command prompt after picking an object to label. To switch back to include a leader, type 'l' at the prompt.
Four preset label styles are provided including variations on the quantity, key name and spacing fields. To customise labels read this topic.
Label style and size can be specified by a predefined dimension or multileader style - or be automatically generated by PlantManager. See the Drawing Annotation Style topic for more information.
When automatically generated, label sizes are calculated by the relationship of the plotting scale to the text height (as set in the options window) and the drawing units. A dimension or multileader style (depending on label options) is created for each scale.
The schedule function counts Mtext and Multileader labels but not the labels of symbols. So it's not necessary to create separate labels for blocks.
Labels generated with a preset format can be manually edited in which case the new value will be used for calculating total quantities and included in the schedule. Manual edits of the quantities displayed in a custom label are not respected in schedule calculations.