|
Getting
Started
|
After setting up PlantManager, a new ribbon menu will be displayed titled PlantMan. If installing for the first time, a palette will appear on the left hand side of the screen.
To populate the palette, open the sample drawing named Planting Sample.dwg in the installation folder. Type 'pal' at the command line to redisplay the palette and begin to explore the detail the software can help create.
What if you're starting a new drawing and want to create a planting or finish plan from scratch? An outline of steps to take include the following:
The palette provides quick access to PlantManager tools and functions from the drawing workspace. It mostly reproduces the functions and editing tools available from the main dialog. You can display the palette by typing 'pal' on the command line or by clicking the Show Palette button on the ribbon.
By default, the palette will not appear when starting a new drawing or opening a previous project however you can change the default behaviour by checking the Show Palette check box on the right hand side of the main dialog.
Plants (or finishes) are defined in lists with each list displayed in the top left panel.

The entries contained within are shown in the bottom panel. Properties of the selected entry are displayed in the top right of the palette - as shown in the screenshot - a plant image, hatch and linetype controls.
When you select a list in the top panel, its contents will be displayed in the bottom panel.
Shortcuts are located at the bottom of the palette including plant drawing tools on the right and buttons to setup lists and create schedules on the left.
The palette allows you to select a list entry and to insert or label drawing objects according to the selection.
Use the display button to show the location of existing objects in the drawing.
You can merge all lists together by checking 'Show All' checkbox at the top of the palette. In this mode, when you click each entry in the lower panel, its parent list will be highlighted in the top panel. Note the panel will be disabled until the Show All checkbox is unchecked.
List items can be edited in place by double clicking to open a small dialog where a subset of data can be modified. After editing, all labels in the drawing will be updated as needed.
If an image of a selected item is found in the image search path it will be displayed at the top of the palette.
When list items are associated with a drawing object such as a hatch, block, or linetype, these will also display
in
a swatch. You can click the swatch (or symbol) to edit its properties and update the drawing with changes.
The position of each window in the palette can be adjusted by clicking and dragging adjacent borders. The palette can be permanently switched on or off by checking the 'Palette display' toggle on the right hand side of the main Dialog
In its switched off state, you can temporarily display the palette using a menu item or type 'pal' at the command prompt. As with all AutoCAD or BricsCAD palettes, you can double click the title bar to undock the window and set the palette to auto-hide as needed.
The palette's position and state (either docked or undocked) will be saved at the time the drawing is closed.
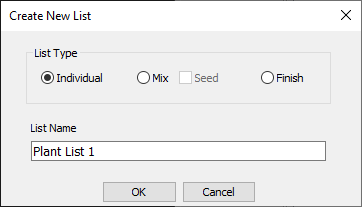
To create a new list, click on the 'New List' button at the top right of the palette. In the dialog which opens, select a list type to create and give it a name.
To add items to a list, click the 'Plants' button or right click in the bottom panel of the palette and select New... from the submenu where you can enter data defining a new entry.
List entries can be edited from the palette by double clicking a selected item - see the screenshot below.

Alternatively you can access the main dialog by clicking the bottom button or double clicking a list name in the top left panel of the palette. Use the main dialog to change options and to edit multiple list items at once.
Once a plant or finish has been defined, you can label or insert it using the 'Label' and 'Create' buttons on the bottom right of the palette.
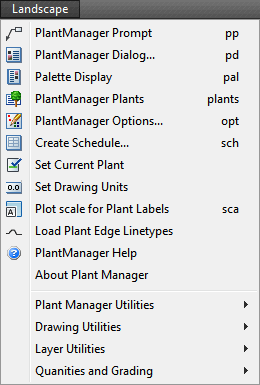
A screen menu is provided with shortcuts to commands and tools. The screen menu is not visible by default in later versions of AutoCAD or BricsCAD but can be enabled by typing 'menubar' at the command line and '1' to turn it on.
Move your mouse over the screenshot at left for more information about each command and links to help documentation about the feature. A subset of commands here are available on the ribbon.
Keyboard shortcuts are shown on the right hand side of the menu.
When starting a new drawing, you will be prompted to confirm the drawing units and plot scale
The menu provides access to these settings and other utilities.